Electric nail drills, also known as professional nail files, are an essential tool in any nail technician’s kit and a popular choice for at-home nail care. They are versatile devices used for a range of tasks, from shaping and buffing nails to removing gel polish and cleaning up cuticles. However, using a nail drill requires knowledge and practice to ensure safety and effectiveness. This comprehensive guide will walk you through the process of using a nail drill, providing tips and precautions to help you achieve salon-quality results at home.
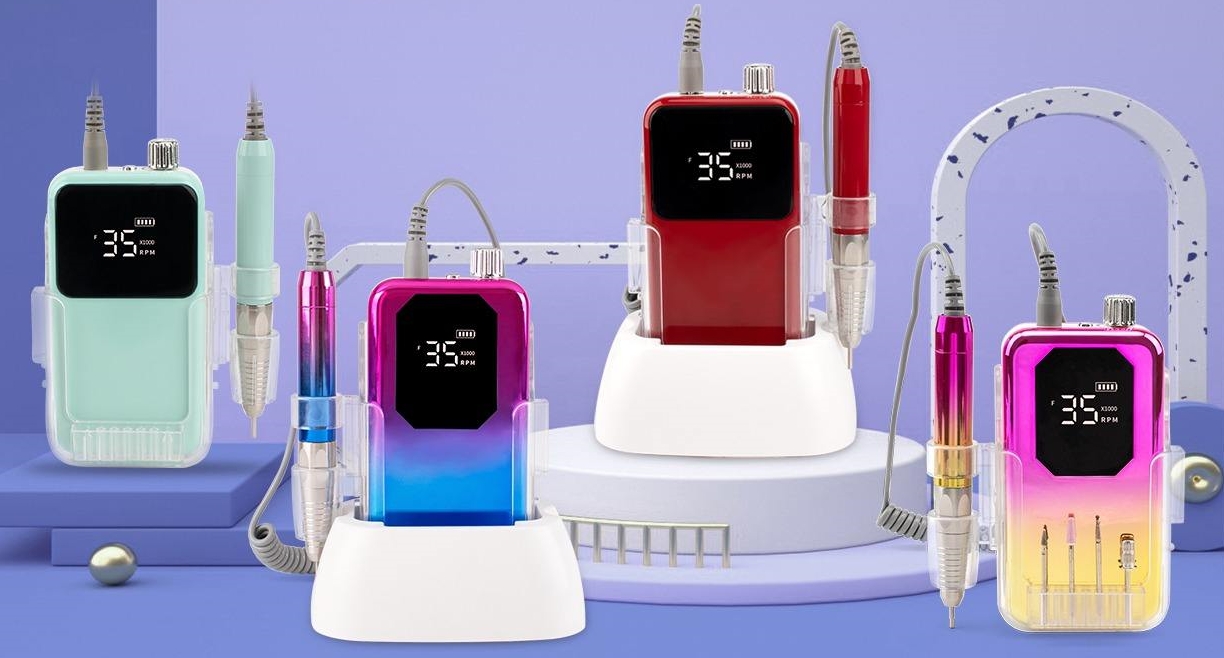
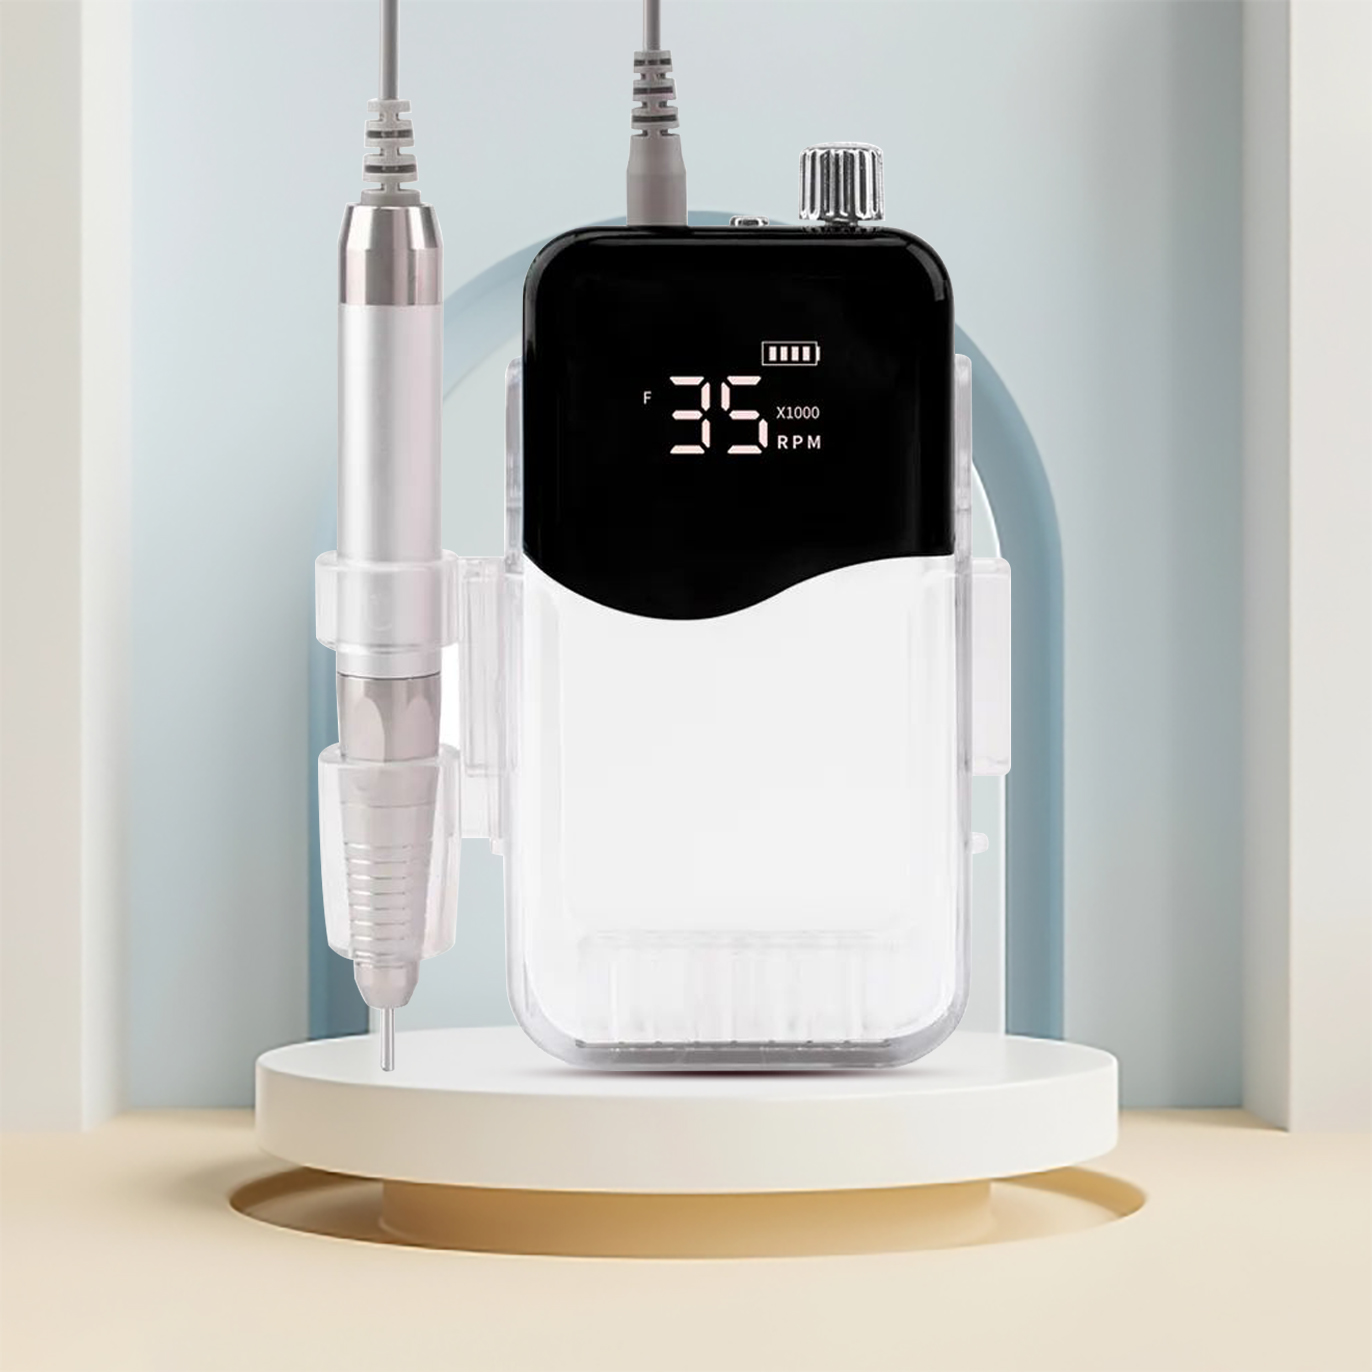
A nail drill is composed of several key components, each playing a crucial role in its operation. These components include the handpiece, the drill bits, the foot pedal, and the base. The most critical part of a nail drill is the handpiece, which houses the motor.
The handpiece is the part of the nail drill that the technician holds during use. It’s designed to be comfortable and easy to handle, allowing for precise control during nail filing and shaping. The handpiece contains the motor, which is the heart of the nail drill.
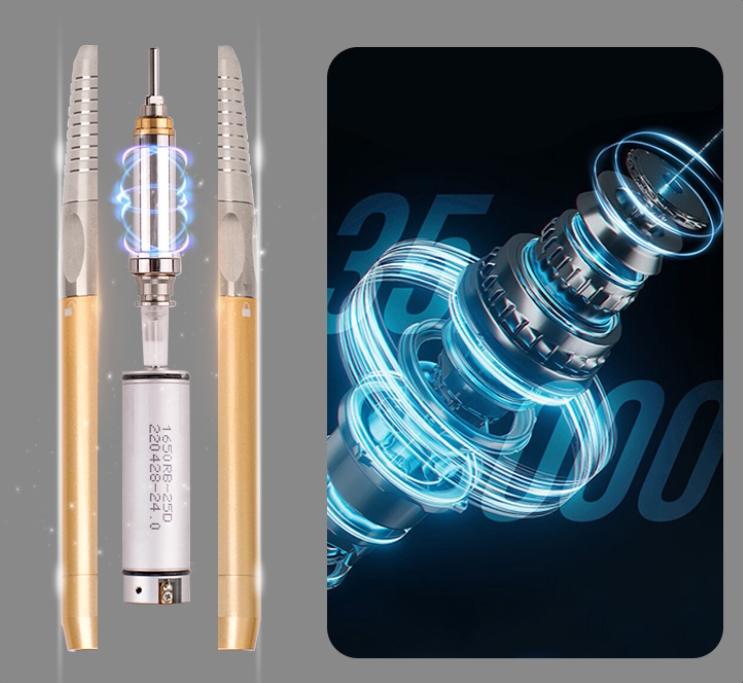
The motor is responsible for the rotation of the drill bits. The power of the motor, often measured in RPM (rotations per minute), determines the speed at which the drill bits rotate. Motors can vary significantly in power, with some offering a maximum of 20,000 RPM, while others can reach up to 35,000 RPM or more. The power of the motor you need will depend on the type of work you’re doing. For example, removing gel or acrylic nails requires a more powerful motor than simple nail buffing.
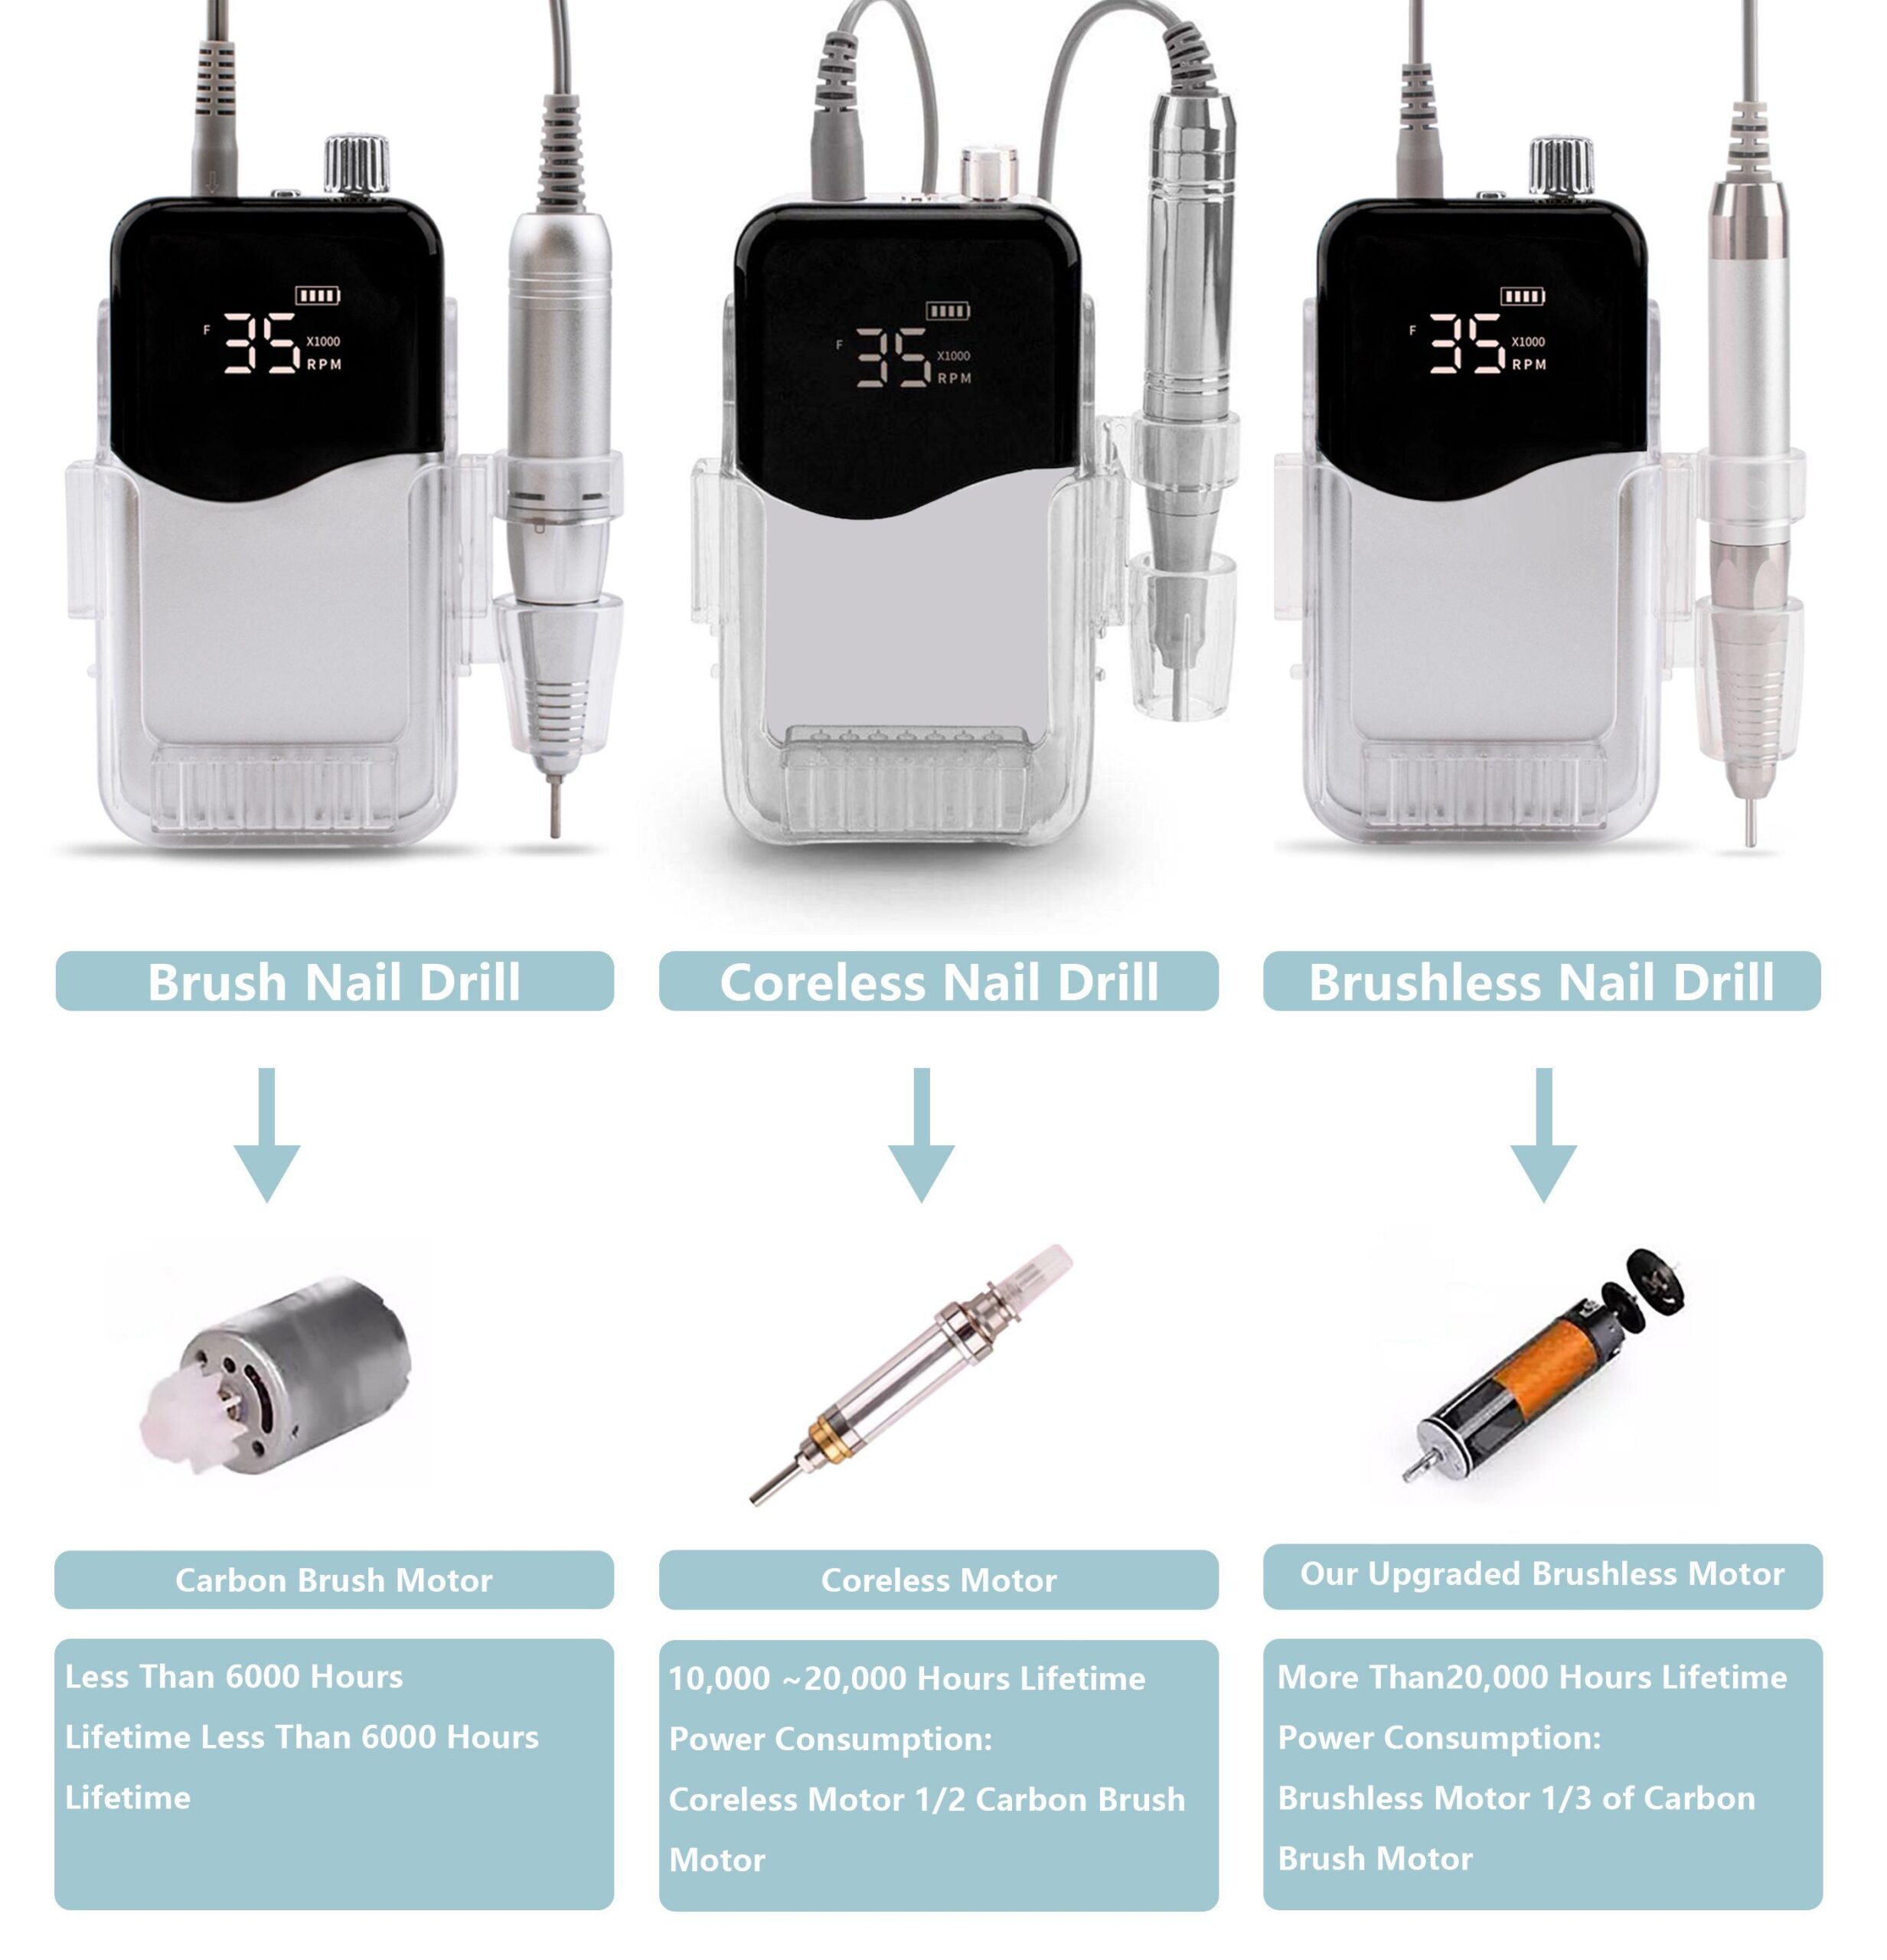
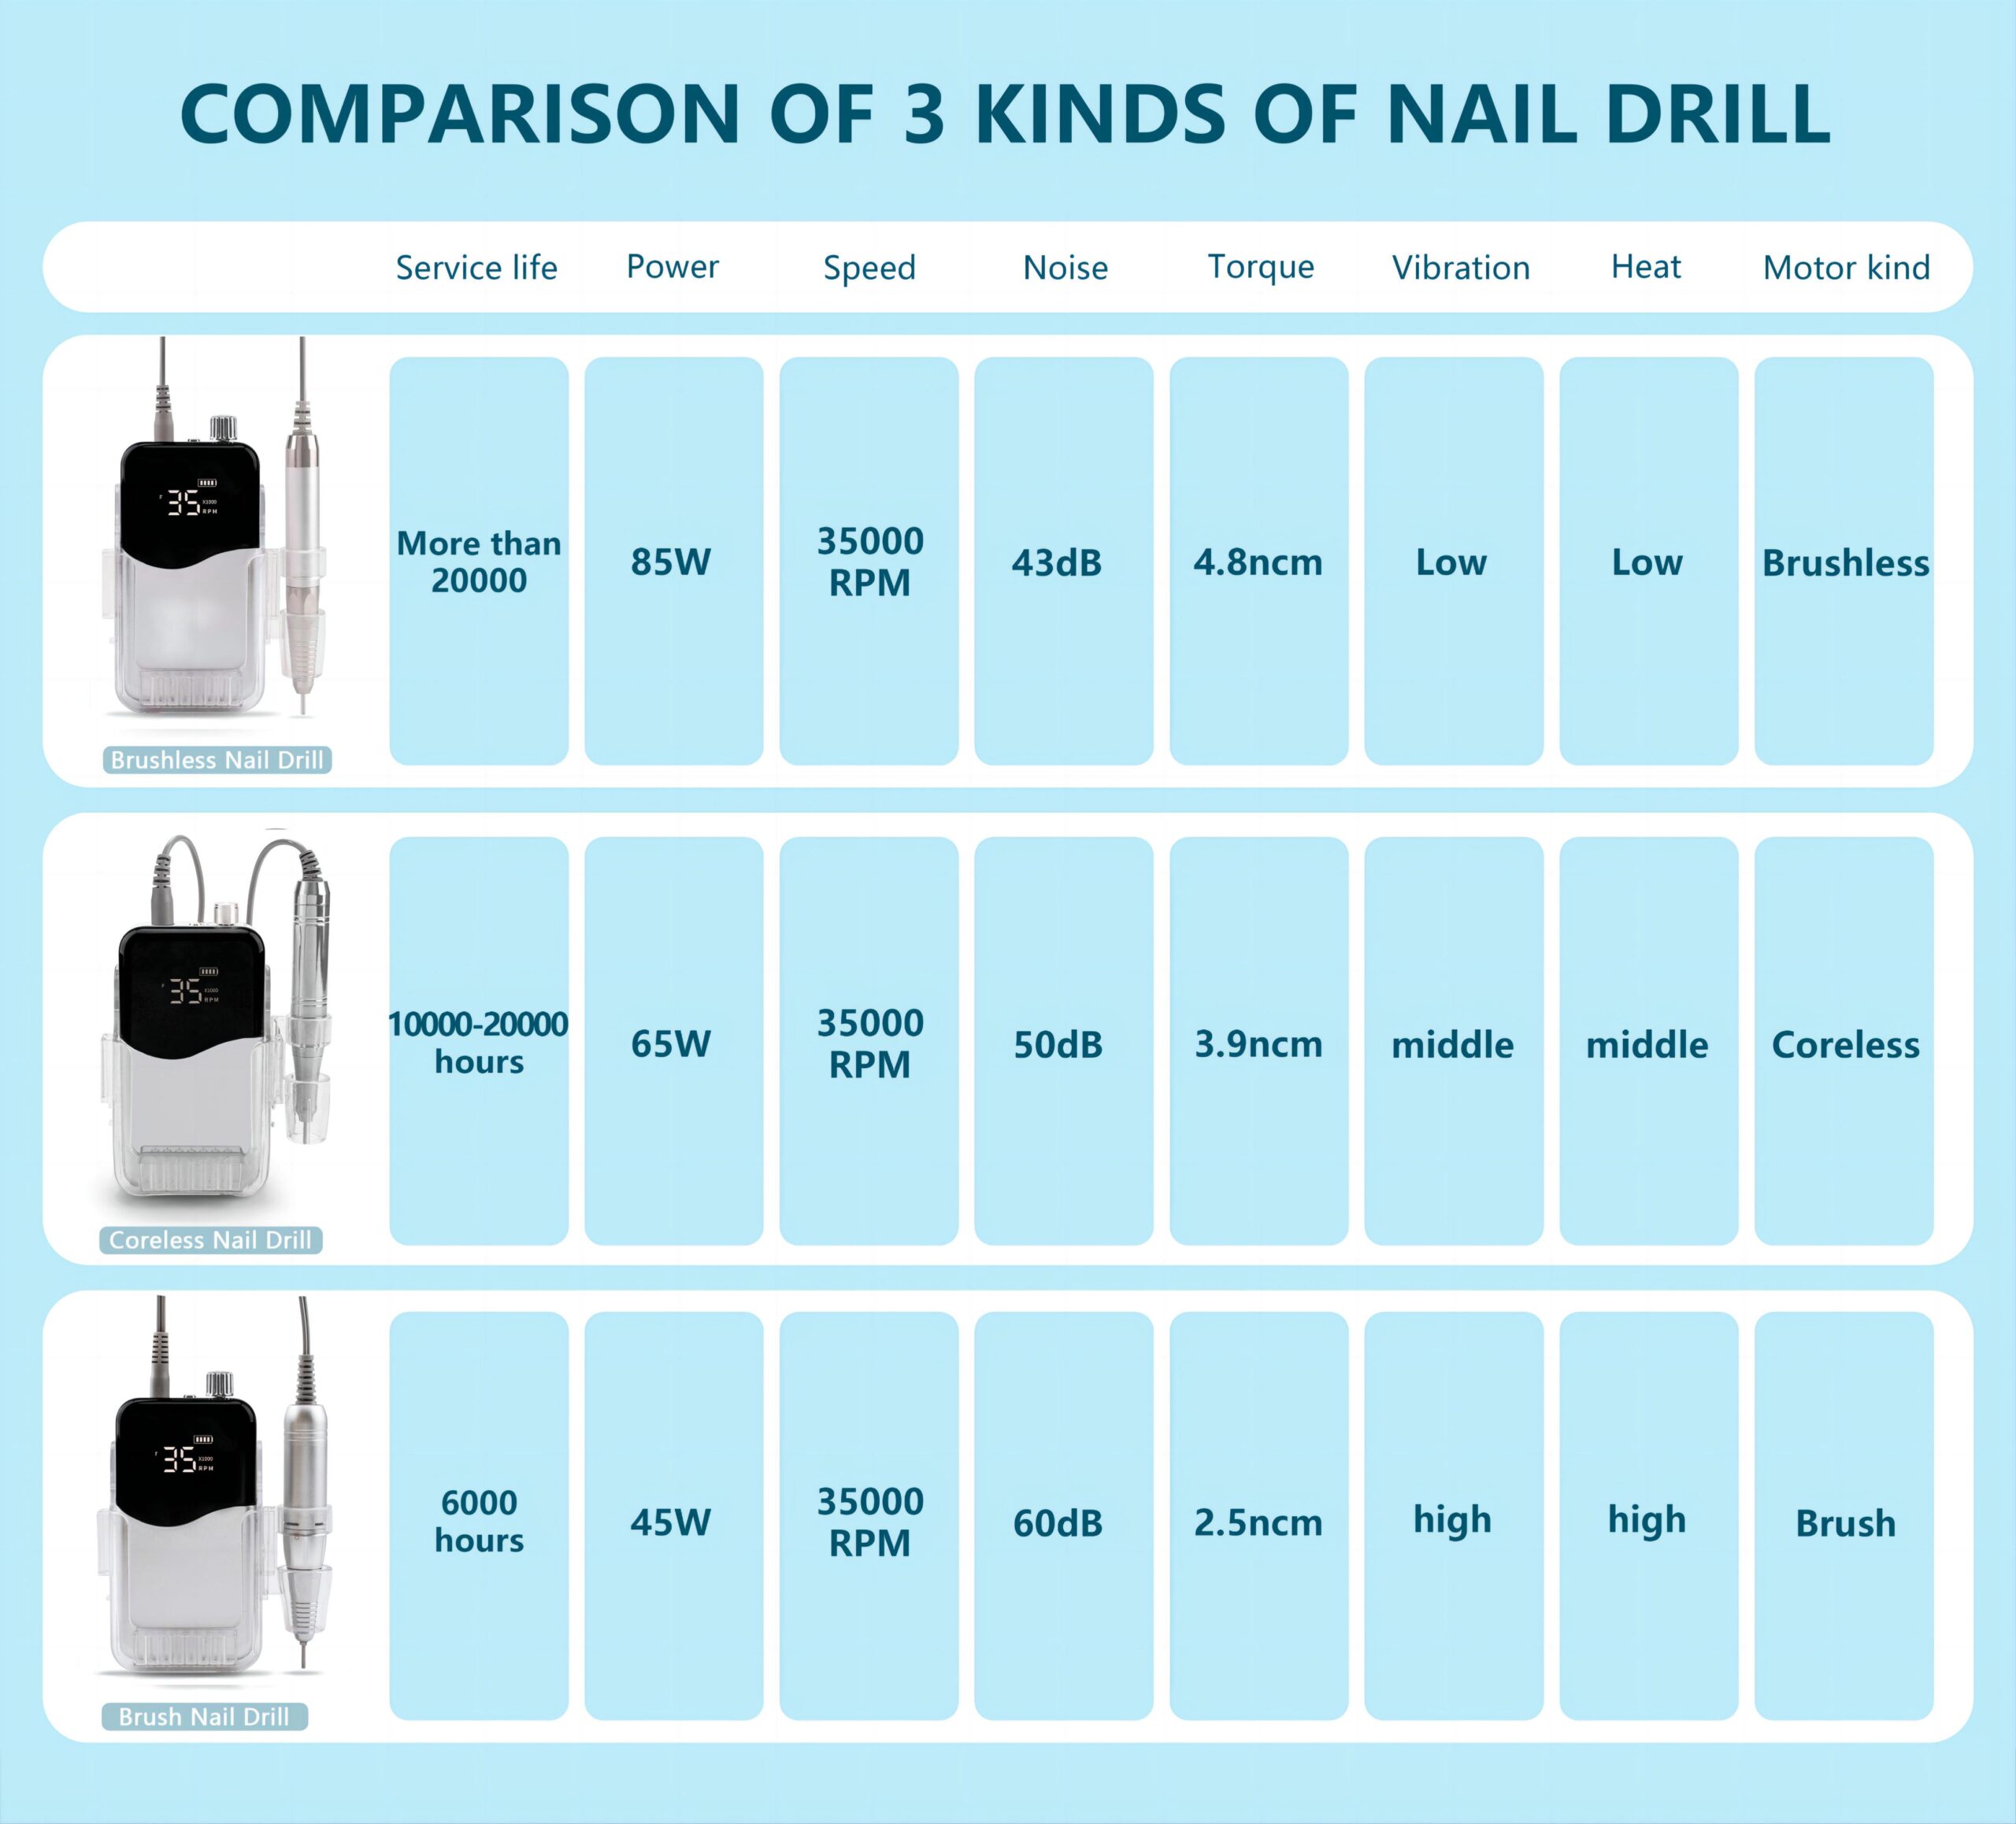
There are three main types of motors found in nail drills: standard motors, brushless motors, and coreless motors.
Standard motors, also known as brushed motors, are the most common type. They are reliable and cost-effective, making them a popular choice for many nail technicians. However, they can generate a lot of heat and noise, especially at higher speeds, and they may require more maintenance as the brushes wear out over time.
Coreless motors, are a recent development in motor technology. Unlike standard and brushless motors, which have a solid metal core, coreless motors have a lightweight, hollow core. This design reduces the inertia of the motor, allowing it to spin up and slow down more quickly. This can result in smoother operation and better control, which can be particularly beneficial when using a nail drill for detailed work.
Brushless motors, on the other hand, are a newer technology. They are more efficient, quieter, and produce less heat than standard motors. They also offer more torque, which means they maintain their speed better when under load. This can be particularly useful when working on harder materials like acrylic. Brushless motors are generally more expensive than standard motors, but they require less maintenance and can have a longer lifespan.
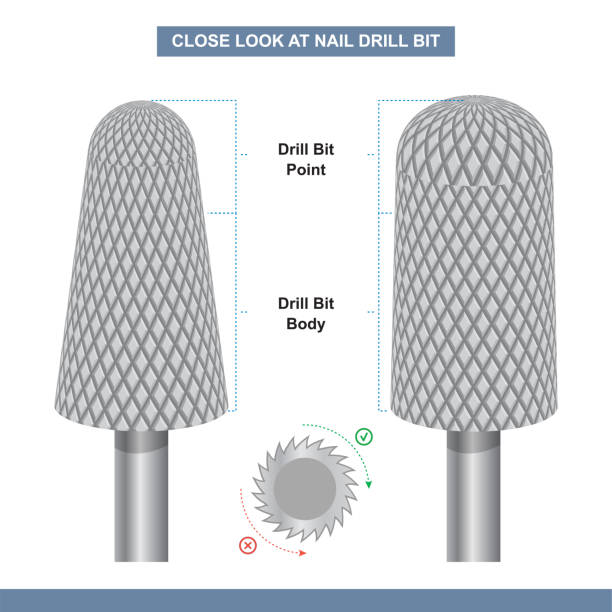
The drill bits are the parts that do the actual filing, buffing, and shaping of the nails. They come in a variety of shapes, sizes, and materials, each designed for a specific task. For example, some bits are designed for removing gel polish, while others are designed for cleaning the underside of the nails. The choice of drill bit will depend on the task at hand.
Some nail drills come with a foot pedal, which allows the technician to control the speed of the drill without using their hands. This can be particularly useful during more complex procedures, as it allows for greater precision and control.
The base of the nail drill houses the controls for the device. This typically includes a power switch, a speed control dial, and a direction switch that allows the technician to change the rotation direction of the drill bits. Some bases also have a built-in holder for the handpiece and slots for storing drill bits.
Torque is a critical factor in the performance of a nail drill. It refers to the force that causes the drill bit to rotate, typically measured in Newton centimeters (Ncm) or Newton meters (Nm). The torque of a nail drill determines its ability to perform under pressure without stalling or slowing down.
When filing or shaping nails, especially artificial ones like acrylics or gels, a nail drill with sufficient torque is necessary to maintain a consistent speed. If the torque is too low, the drill might stop or slow down when pressure is applied against the nail, leading to uneven results and potential damage to the nail or drill bit.
Conversely, a nail drill with high torque can maintain a consistent speed even when working on hard materials or applying more pressure. This can result in smoother, more precise results, making the nail drill more efficient and easier to use. However, high torque isn’t always better. If the torque is too high, it can cause the drill bit to rotate too quickly or forcefully, which can be difficult to control and potentially dangerous. Therefore, it’s important to choose a nail drill with an appropriate level of torque for your needs and skill level.
Different types of motors can produce different levels of torque. For instance, standard motors and brushless motors can produce high levels of torque, but they can also generate a lot of heat and noise, especially at higher speeds. Coreless motors, on the other hand, can produce a similar level of torque with less heat and noise due to their lightweight, hollow design.
Torque and power are two related but distinct physical concepts. Torque is a moment of force, describing the ability of a force to cause an object to rotate about a point. In power tools like nail drills, torque usually refers to the rotating force produced by the motor. The greater the torque, the stronger the motor’s ability to maintain stable rotation when facing resistance, such as when the drill bit applies pressure on the nail.
Power, on the other hand, is the rate at which work is done or energy is transferred in a unit of time. In power tools, power usually refers to the amount of work the motor can accomplish in a unit of time. The greater the power, the more work the motor can do in a given time.
The relationship between torque and power can be expressed by the formula: Power = Torque x Angular Speed. This means that for a given power, if the torque increases (for example, because the motor is facing greater resistance), the angular speed (i.e., rotation speed) must decrease, and vice versa.
Therefore, while both torque and power are important parameters describing motor performance, they describe different performance characteristics. Torque mainly focuses on the motor’s ability to resist force, while power mainly focuses on the speed at which the motor can complete work.
In conclusion, understanding the role of torque and power in a nail drill can help you choose the right tool for your needs. By considering factors like the type of work you’ll be doing, your skill level, and the type of motor in the nail drill, you can find a tool that offers the right balance of power, performance, and ease of use.
Nail drills offer numerous benefits. They can help you achieve professional-quality results at home, save time on filing and buffing, and provide a more precise and detailed nail care experience.

Safety should always be your top priority when using a nail drill. Always start with a low speed and gradually increase as needed. Avoid applying too much pressure as it can cause heat buildup and damage the nails. Always keep the drill moving to prevent focusing on one spot for too long. Lastly, ensure that your drill bits are clean and sharp to prevent infection and ensure efficient operation.
Before using a nail drill, it’s important to prepare your nails. Start by cleaning your nails and removing any old polish. Trim your nails to the desired length using a nail clipper. Push back your cuticles using a cuticle pusher. This will provide a clean and clear surface for the nail drill to work on.

Start by selecting the appropriate drill bit for the task at hand. Insert the bit into the drill and secure it. Turn on the drill and adjust the speed to a comfortable level. Hold the drill like a pen and start working on your nails. Remember to keep the drill moving and avoid focusing on one spot for too long. After you’re done, turn off the drill and remove the bit.
Proper cleaning and maintenance of your nail drill will ensure its longevity and effectiveness. After each use, remove the drill bit and clean it using a brush and warm soapy water. Dry the bit thoroughly before storing it. Regularly check your drill for any signs of damage or wear and replace any worn-out parts promptly.
16 Years
Experience
12 Months
Warranty
Monday - Sunday
24/7 Customer Support
Be the first to know about special offers, new innovations and more.